In Part 3 of our HTTPS Everywhere series we explained how to choose and buy a certificate for your website domain.
We’ll now show you how you can install and configure the certificate you’ve downloaded in the nginx webserver.
Combine domain certificate and the intermediary certificates
First we will combine our domain certificate with all the intermediary certificates (except the root CA certificate).
We do this for the following reasons:
- the browser will receive the full certificate chain. (except for the root certificate but the browser already has this one builtin).
- Some browsers will display warnings when they can not find a trusted CA certificate in the chain. This can happen if the chain is not complete.
- Other browsers will try to download the intermediary CA certificates; this is not good for the performance of your website because it slows down setting up a secure connection. If we combine all the certificates and configure nginx properly this will be much faster.
Note: In general a combined SSL certificate with less intermediary CAs will be a little bit better performance wise still.
You can combine the certificates on your server, after you have uploaded all the certificate .crt files with the following command:
$ cat <your_domain>.crt COMODORSADomainValidationSecureServerCA.crt COMODORSAAddTrustCA.crt > yourdomain.chained.crtyourdomain.chained.crt can now be configured in nginx
Configure Nginx HTTPS and HTTP/2
You’ll need to add the following configuration inside a server {…} block in the nginx configuration. Please refer to our Configuring your website domain in nginx section.
$ sudo nano /usr/local/nginx/conf/conf.d/mywebsite.com.conf

server {
        server_name www.mywebsite.com;
        # SSL config
        listen <ipv4 address>:443 default_server ssl http2;
        listen [ipv6 address]:443 default_server ssl http2;

        ssl_certificate /usr/local/nginx/conf/<yourdomain.chained.crt>;
        ssl_certificate_key /usr/local/nginx/conf/<yourprivate.key>;
	...
}
In this configuration we tell nginx to listen on an IPv4 and IPv6 address on the default HTTPS port 443. We enable ssl and http2.
HTTP/2 is the next generation standardized HTTP v2 protocol. It is based on the SPDY Google specification which manipulates HTTP traffic, with the goal to reduce web page load latency. It uses compression and prioritizes and multiplexes the transfer of a web page so that only one connection per client is required. (eg. Getting the html, images, stylesheets and javascript files all happens with a connection that is kept open).
You can check an example what kind of performance improvements are possible with HTTP2 on the Akaimai HTTP2 test page
HTTP/2 is best used with TLS (Transport Layer security) encryption (eg. https) for security and better compatibility across proxy servers.
Now restart the nginx server. Your site should now be accessible via https.
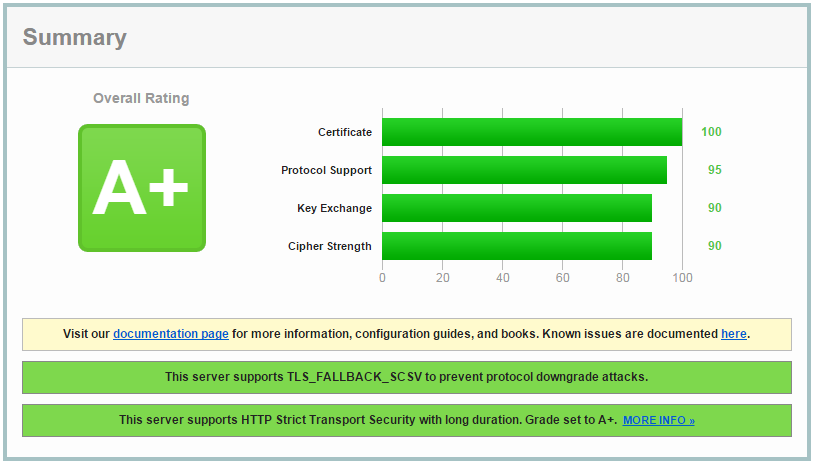
We recommend you to now run an SSL analyzer. You’ll get a security score and a detailed report of your SSL configuration
I started my first website Wim's BIOS (https://www.wimsbios.com) back in 1996 as a hobby. Wim’s BIOS is still the internet premier source for finding BIOS Updates.
More then 15 years later this technology site keeps going strong with thousands of visitors every day.
My book "Fast, Scalable and Secure Webhosting" will show you how to set up your server using Linux, Nginx, MariaDB, PHP-FPM, Java, IPv6, HTTPS, HTTP/2, WordPress and much more!
- Google PageSpeed Insights: Scoring 100/100 with WordPress - August 2, 2016
- Enabling SSL – HTTPS on a CDN (HTTPS Everywhere Series – Part 6) - May 11, 2016
- Getting an A+ grade on SSLLabs.com (HTTPS Everywhere Series – Part 5) - May 9, 2016
Share this Post
Comments 2
Pingback: How to buy a HTTPS SSL certificate (HTTPS Everywhere - Part 3) - FastWebhostingSecrets.com
Pingback: Getting a HTTPS A+ grade on SSLLabs.com (HTTPS Everywhere Series - Part 5) - FastWebhostingSecrets.com